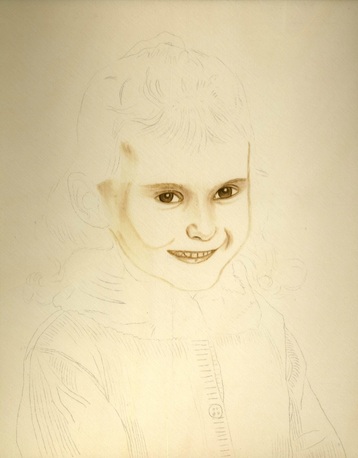
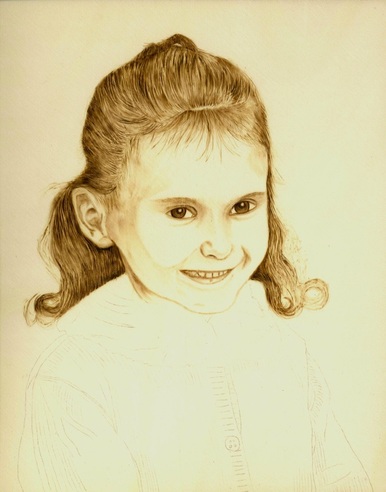
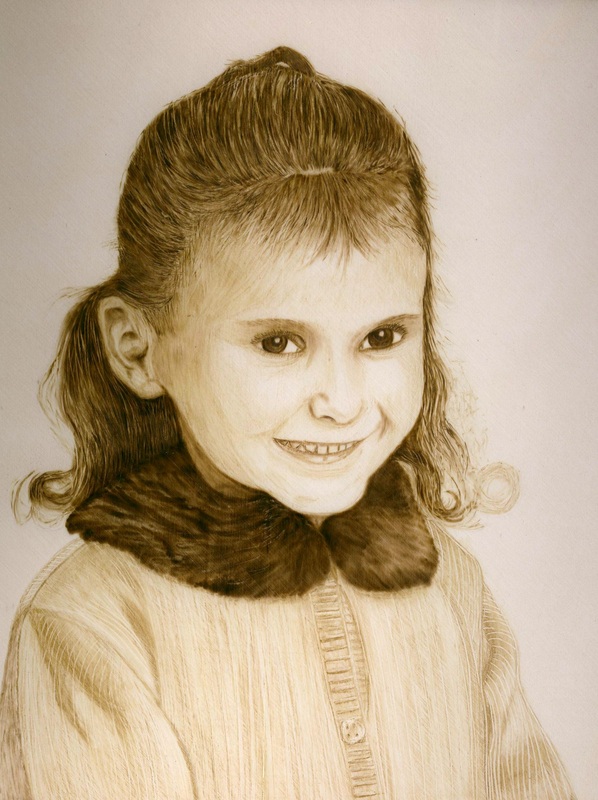
Portrait of Megan

Hello Everyone....
To wood burn a portrait I start out with a photo of the person or pet. If it's a commission, the customer usually e-mails me a photo or they mail the photo to me (the original photo will be returned with the artwork). I will scan the photo into my computer and then I print out a black and white copy of the photo in the size of the portrait I am going to do. Megan was done as an 8” x 10” size.
Next I find the piece of wood I want to put it on, I used Italian Poplar for this portrait, and do several sandings starting with 400 grit sandpaper and end up with 600 grit sandpaper. Always sand with the grain of the wood.
Then I “buff” the wood by using a brown paper lunch bag and move it over the wood as if I were sanding it.
Sanding is the most important step! The smoother the wood feels the easier it will be to burn on.
Now I am ready to transfer the picture onto the wood. I do this by taking the picture and placing it on the wood to position it where I want it to be. Once I have found this I take “painters tape” and tape the picture to the wood so that it won’t move while I am transferring. I usually tape at the top of the photo.
The next step is to place “graphite paper”, (never use carbon paper as it is difficult to remove the markings), under the picture so it will be ready to trace the photo onto the wood.
Make sure you have the tracing paper with the shiny side face down on the wood, if you don’t you will be tracing the photo onto the back of your paper and not onto the wood.
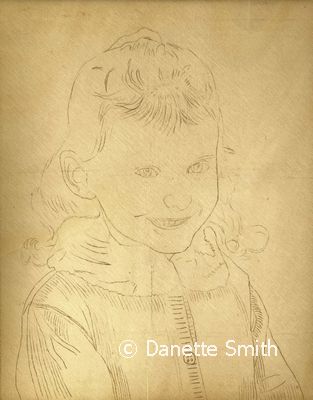
I always take a peek under the graphite when I first start tracing to be sure it is transferring onto the wood. I use a “red ink” pen and begin to trace over the lines of the photo. The red ink allows me to see what lines I have already traced.
Now that the photo is traced onto the wood it will look like this…
To wood burn a portrait I start out with a photo of the person or pet. If it's a commission, the customer usually e-mails me a photo or they mail the photo to me (the original photo will be returned with the artwork). I will scan the photo into my computer and then I print out a black and white copy of the photo in the size of the portrait I am going to do. Megan was done as an 8” x 10” size.
Next I find the piece of wood I want to put it on, I used Italian Poplar for this portrait, and do several sandings starting with 400 grit sandpaper and end up with 600 grit sandpaper. Always sand with the grain of the wood.
Then I “buff” the wood by using a brown paper lunch bag and move it over the wood as if I were sanding it.
Sanding is the most important step! The smoother the wood feels the easier it will be to burn on.
Now I am ready to transfer the picture onto the wood. I do this by taking the picture and placing it on the wood to position it where I want it to be. Once I have found this I take “painters tape” and tape the picture to the wood so that it won’t move while I am transferring. I usually tape at the top of the photo.
The next step is to place “graphite paper”, (never use carbon paper as it is difficult to remove the markings), under the picture so it will be ready to trace the photo onto the wood.
Make sure you have the tracing paper with the shiny side face down on the wood, if you don’t you will be tracing the photo onto the back of your paper and not onto the wood.
I always take a peek under the graphite when I first start tracing to be sure it is transferring onto the wood. I use a “red ink” pen and begin to trace over the lines of the photo. The red ink allows me to see what lines I have already traced.
Now that the photo is traced onto the wood it will look like this…
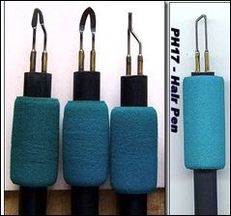
Below is a list of pens that can be used to do this portrait...
|
|
|
Variable Temperature Tips
Left to Right: Rounded Heel Skew Bent Spear Shader Ball Point Tip Hair Pen |
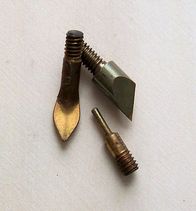
Single Temperature Tips
Solid Point Brass Tips: Trowel-Shaped Flat Shader Universal Tip Solid Skew Solid Point Writer |
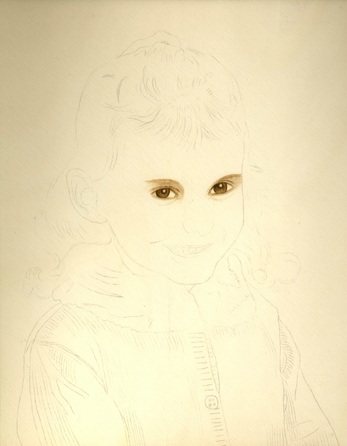
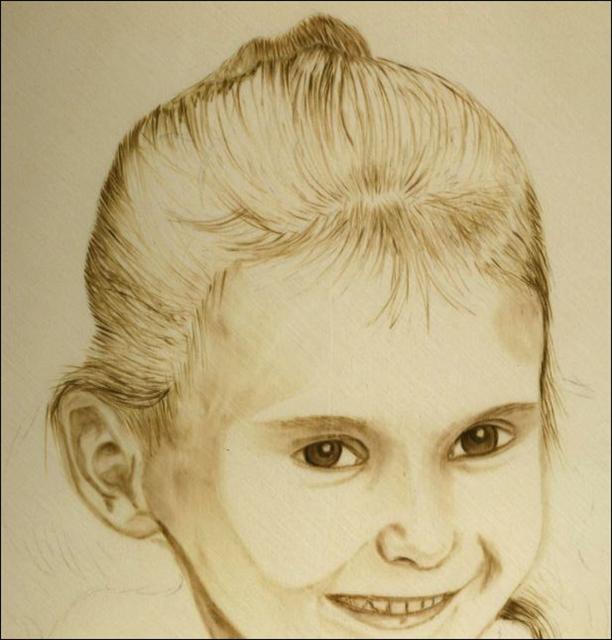
I’m now ready to start burning the portrait. Using the shading tip I now start with her eyes. I always do the eyes first…it helps me capture her likeness. If the eyes don’t turn out right the rest of the portrait won’t be right.
Never use a skew to outline anything on a portrait…it will produce a deep line into the wood. You want a soft outline of the eyes.
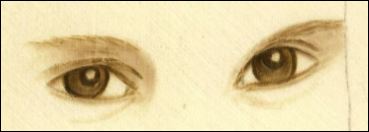
I use the ballpoint tip to outline the iris and pupils as it doesn’t dig into the wood, but rather flows over the wood. Next I use the bent spear shader to shade the iris in. I continue to lightly shade the upper and lower eyelids using the shader. Here is Megan with her eyes done…
Never use a skew to outline anything on a portrait…it will produce a deep line into the wood. You want a soft outline of the eyes.
I use the ballpoint tip to outline the iris and pupils as it doesn’t dig into the wood, but rather flows over the wood. Next I use the bent spear shader to shade the iris in. I continue to lightly shade the upper and lower eyelids using the shader. Here is Megan with her eyes done…
|
|
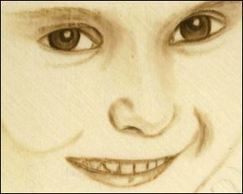
Next I do her nose, mouth, teeth and add some shading to these areas using the shading tip again…I also lightly outline the shape of her face using my shader tip….she is now starting to come to life…
|
|
Now I move to the left side of her face and add more shading, and using the shading tip I softly outline and shade her ear. I add light shading to her cheeks, chin, and forehead.
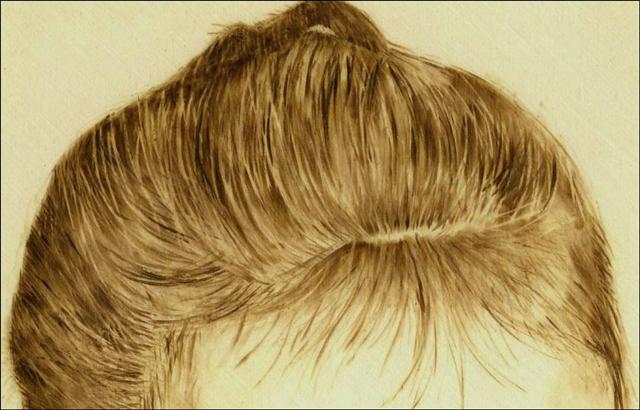
Next I switch tips and using my hair pen tip I begin to lightly add her hair being careful to follow the direction her hair is going in.
Next I switch tips and using my hair pen tip I begin to lightly add her hair being careful to follow the direction her hair is going in.
|
|
I keep burning her hair so that it becomes all shaded in. Watch for where the highlights are in the hair so that you burn that area lighter. Notice that her hairline is not outlined or solid…there are always wisps of hair and broken ends that stick out.
|
|
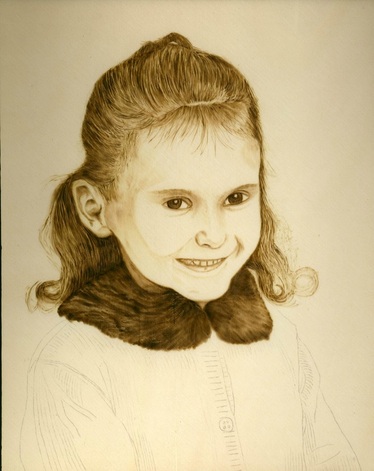
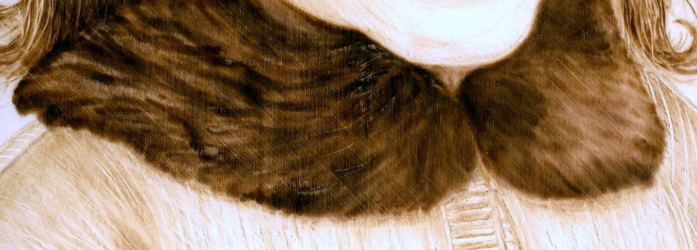
It’s now time to move onto her fur collar on her sweater. I turn her picture sideways and using the shading tip I start under her chin and begin to draw the tip towards me on her left collar.
I make short stokes having some areas lighter and others darker. Then I turn the picture again, straight up, and begin on her right collar by drawing the tip downward towards me. When done it will look like this…
|
|
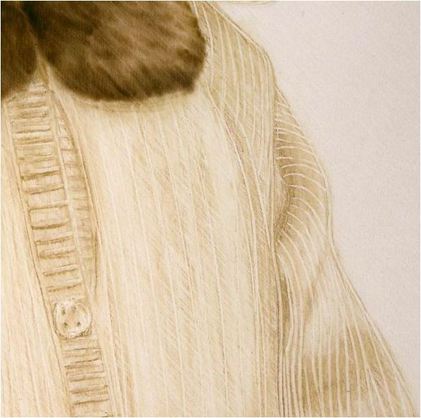
Next it’s time to do her sweater. I was trying to figure out how I would get the look of the knit lines in the sweater and did some experimenting and came up with this... I took my hair pen and using either no heat or a very, very low heat, I started drawing in the lines of the sweater.
You need to follow the direction all the curves and bumps in the sweater. Once I got all the lines put in I took my shading tip and lightly shaded over all the lines. This leaves a reverse effect where the top of the sweater is shaded, but the lines are indented into the wood and don’t get shaded when passed over with the shading tip. Pretty cool, huh?
|
|
Last but not least…I go back and look where I need to add more shading. When I feel it is almost done I put it somewhere in my house so that I can see it as I pass by for a couple of days and look at it as I go by. This allows me to look for anything I may have missed. I have a piece of paper near the picture and I write down anything I think needs to be added.
After a couple of days I will go back and touch up anything I may have seen during those couple of days and finish it up. Sign it and I’m done.

|
|
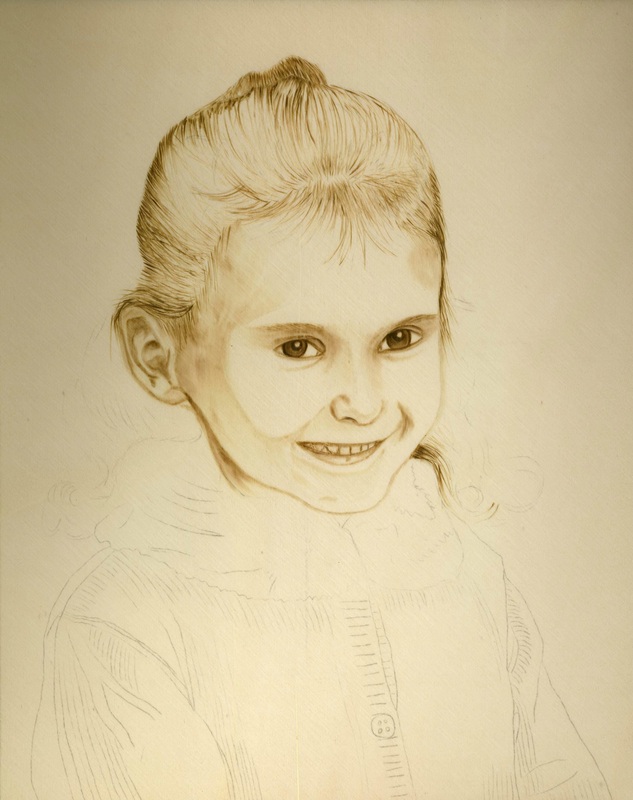
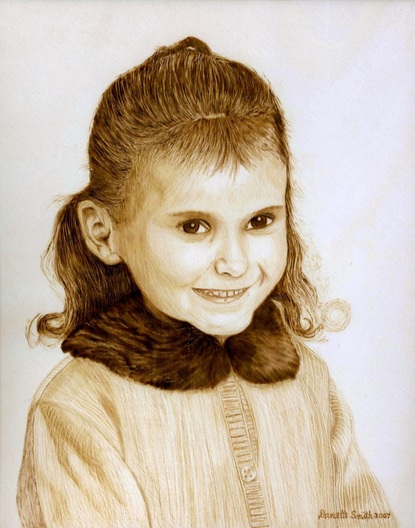
I hope you all find step-by-step tutorial interesting. This portait took me 40 hours to do. Blessings, Danette
“Keep burning and learning™ ©
Danette Smith, Pyrographic Artist, Author, and Instructor
Artwork/Photos on this web page are the property of the artist.
You may not copy, modify, reuse, download, or distribute these images
without the express written permission of the artist Danette Smith.
You may not copy, modify, reuse, download, or distribute these images
without the express written permission of the artist Danette Smith.